

You have created a WordPress website and now you want to monitor the traffic on your site.
There is a simple way of monitoring the traffic to your newly built website. Now it’s time to get into how to create a plugin and activate. I know it might seem a little confusing at first but this is very simple. The way that Google tracks your traffic is by inserting the snippet of code into the head of each page. With WordPress, you only have to use the code one time and activate the plugin.
Get Started With What You Will Need
There are few options you could use when creating the plugin.
You could use a code/text editor of your choice. I prefer to use Atom. You will need an FTP access to the site to upload the plugin file, as in Filezilla.
Also, you want to make sure that within the header.php file you see the wp_head hook. How to check your WordPress header.php file. On your left sidebar, hover over Appearance and at the bottom of pop-up, you will click on Editor. From that screen, you will see the header.php file on the right-hand side. Click there and you shall see the wp_head hook.
Now let us go through the steps to creating the plugin.
1. Open your text editor and create the file. I named my file wprockcoconut-google-analytics.php, you could name your file anything you want. Next, you will want to create the plugin name to identify with.
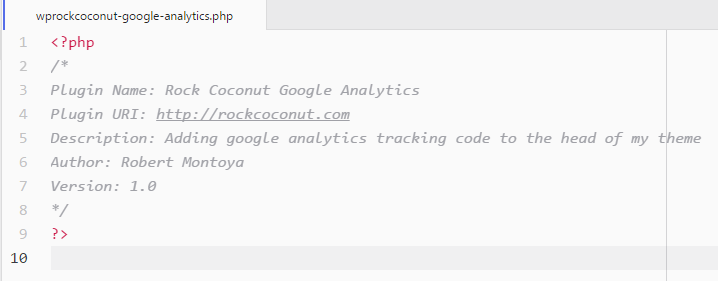
How to create a plugin for Google Analytics to your WordPress
2. Next, write the next line of code under the plugin information in the same file.
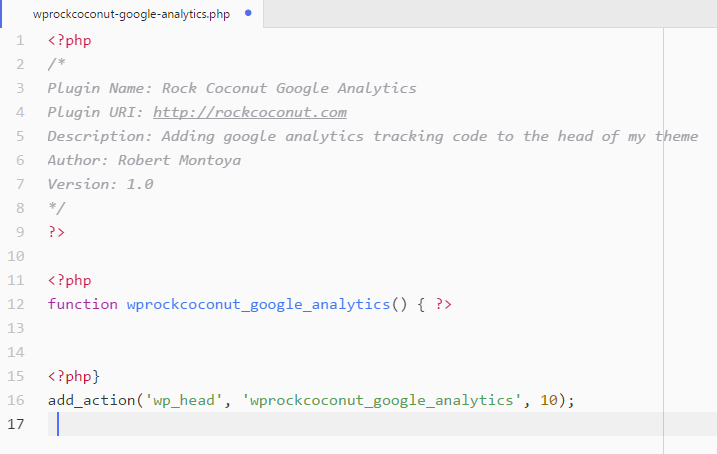
How to create a plugin for Google Analytics to WordPress
3. Next, copy the code that Google Analytics give you. I have cut out my account information for security purposes.
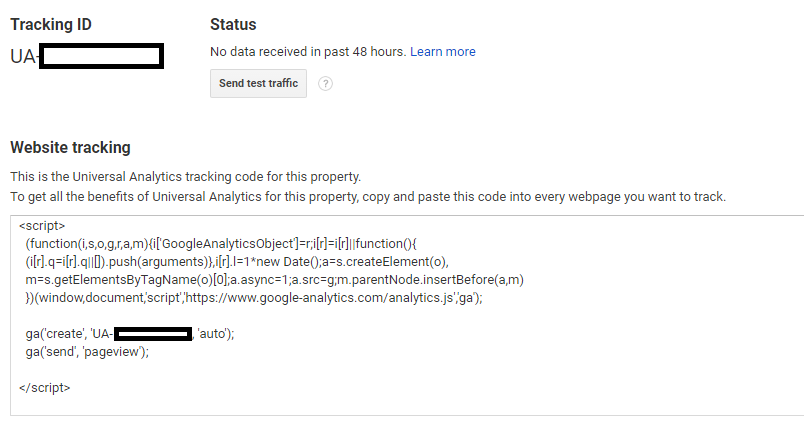
How to create a plugin for Google Analytics and WordPress
4. Next, paste that code from Google Analytics in your plugin file, including script tags.

How to create a plugin for Google Analytics and WordPress
5. After saving this file, you will now locate the folder within your WordPress to upload to. The Folder path would be wp-content/plugins. Once you upload the file to this location, go to your WordPress dashboard and click on Plugins. Next, you will have the list of all the plugins that you have installed and now you should see your plugin that you have created. Once located click on the Activate button and your finished.

How to create a Google Analytics Plugin for WordPress
Now you have completed the steps of making your own plugin for Google Analytics.
Note: Workaround if you do not use a code/text editor and do not use an FTP access application.
- Open cPanel
- Click on File Manager
- Locate your WordPress Files in Public_html
- Go to wp-content/plugins
- Click create file
- Name your file with the .php ext
- Then you could highlight that file and right click to code edit
- Then you could write the same code and paste your Analytics snippet from Google also
- Save your file and then activate your plugin
If you would like more information regarding Web Design. Contact us today through our contact form or by phone.
Contact Us Click to Call